iObserve is clear and easy to use, but to help you get started we have put together some tutorials.
See below for a list of tutorials or contact us for help or suggestions.
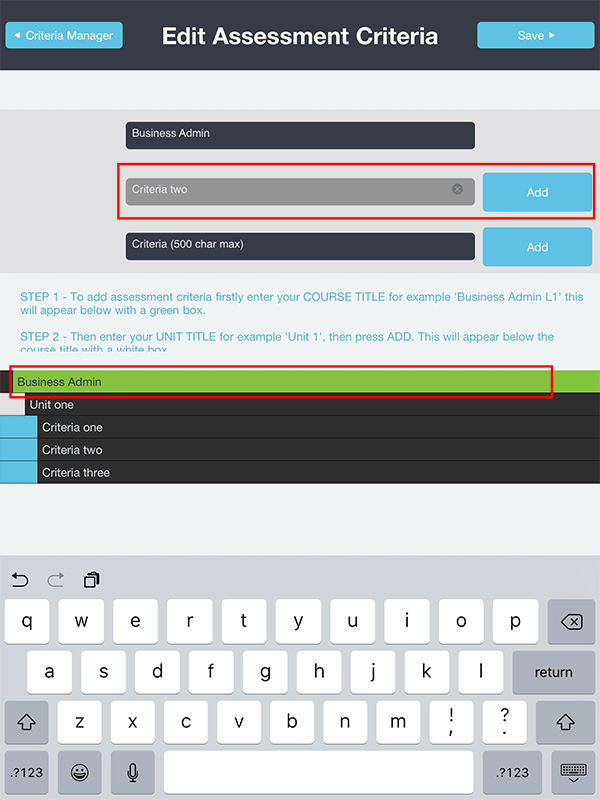
How to add assessment criteria in iObserve
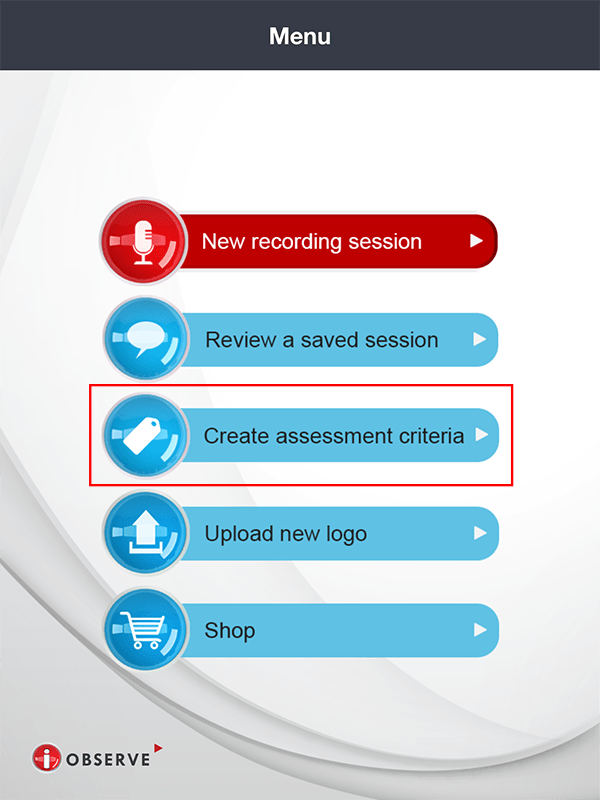
1. To add assessment criteria, firstly navigate to the ‘Edit Assessment Criteria’ screen (Menu > Create assessment criteria > Add/Create New Assessment Criteria).
Note: You won’t be able to record until you have created assessment criteria.
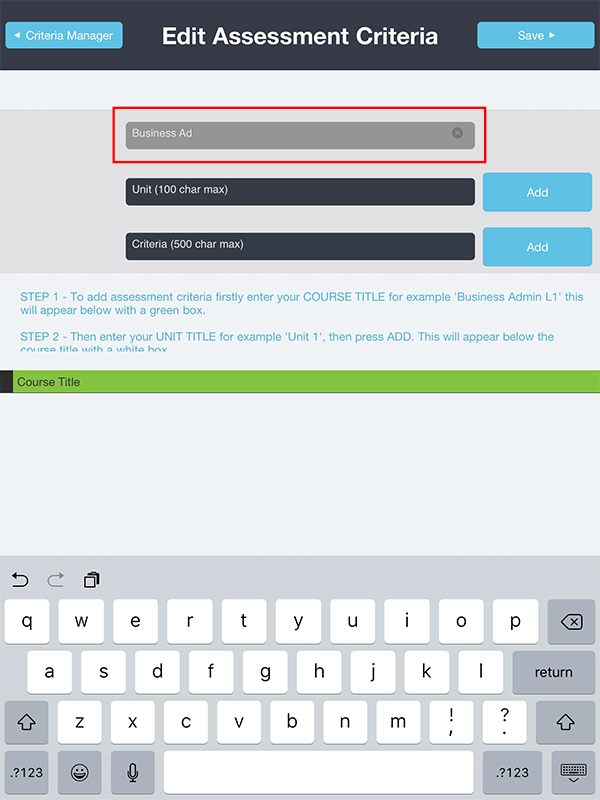
2. To give your course a title, for example, “Business Admin”, simply type into the ‘Course Title’ text field. This updated course title will appear below the instruction text within a green box.
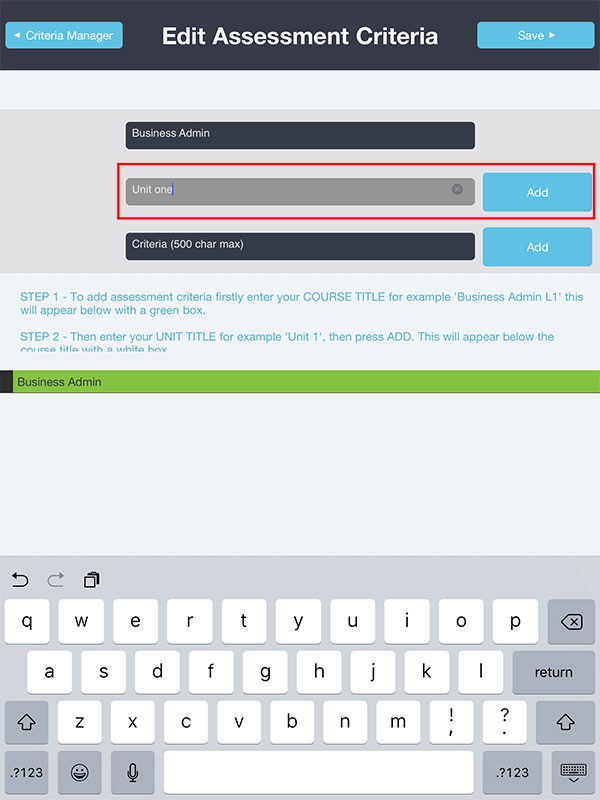
3. To add a unit to your course, for example, “Unit one”, simply type into the ‘Unit’ text field and press ‘Add’. This will appear below the course title within a white box.
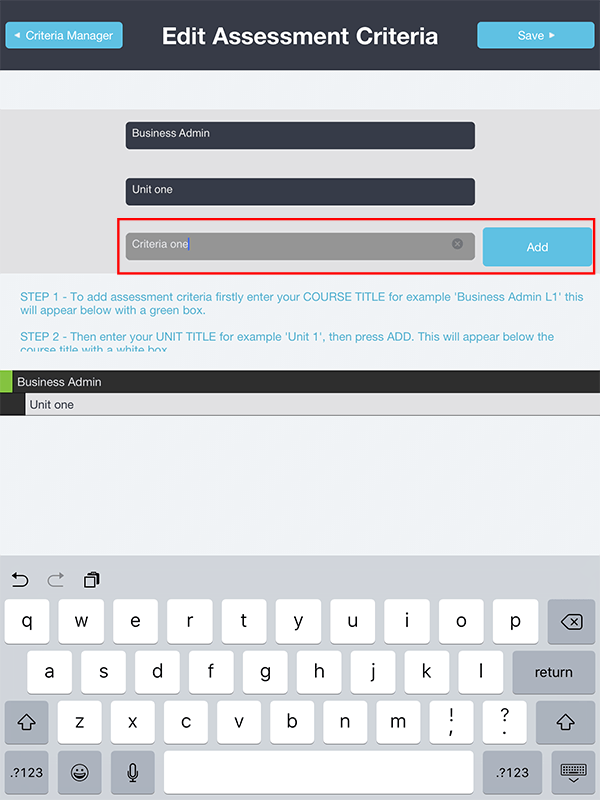
4. To add criteria to a unit, for example, “Criteria one”, simply select the unit you wish to add the criteria to, type into the ‘Criteria’ text field and press ‘Add’. This will appear below the unit within a blue box.
Note: The unit you wish to add the criteria to must be selected before you begin typing criteria.
5. To add additional units, select the course title (it will be highlighted in green), type into the ‘Unit’ text field and press ‘Add’. Repeat the add criteria process (Step 4).
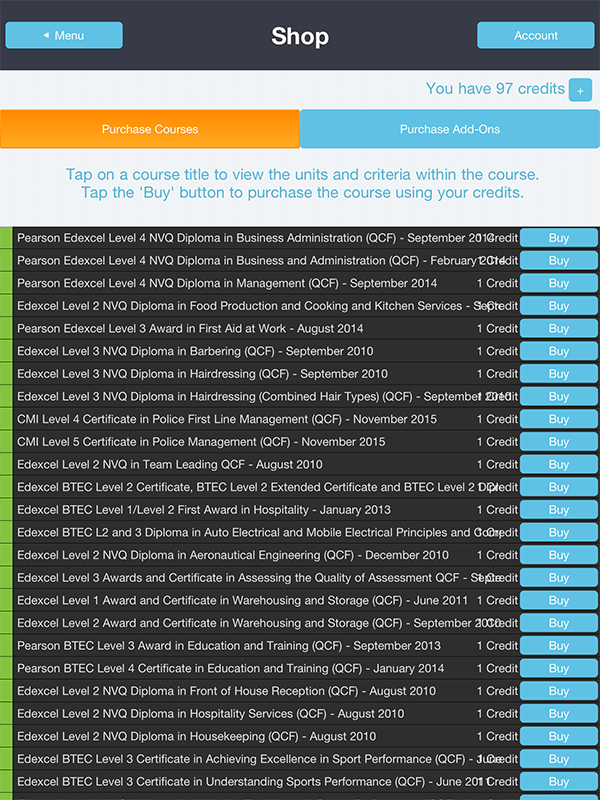
6. Alternatively, check out our shop on the ‘Menu’ screen to see if we already have the criteria you require available for download.
How to record in iObserve: the complete observation process
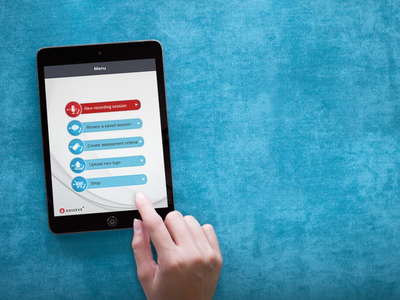
1. On the main menu screen press the New recording session button.
2. Enter the session title, observer’s name, and student’s name.
3. Select your assessment criteria from the list and press the red start button.
4. Press the red record button to begin the recording. The timer will then start. Throughout the observation, when a candidate meets a criterion simply press that criterion and it will be time stamped.
5. When you’re finished with the observation, press the pause button then end session. Note: The recording won’t be saved until you complete the Review recording process.
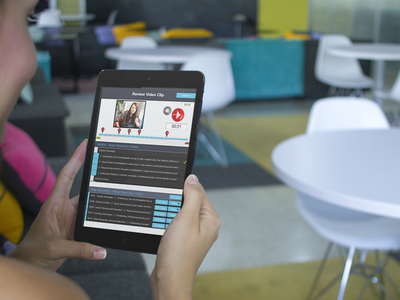
6. The Review Clip screen has a timeline along the top. Red markers show where in the recording the criteria were met. The screen has two sections – Review which lists all of the criteria for the course, and Time Recorded which shows when in the recording each criterion was met.
7. To replay the entire recording, press the red play button. To replay a specific time stamp, go to the Time Recorded section and press the relevant recording.
8. If when reviewing the recording you find that you missed a criterion, simply play the recording, then press the relevant criterion at the relevant time and a new time stamp will appear. If you find that you’ve made an error, you can press the blue delete button to remove a time stamp.
9. Press finish in the top corner to move to the next screen.
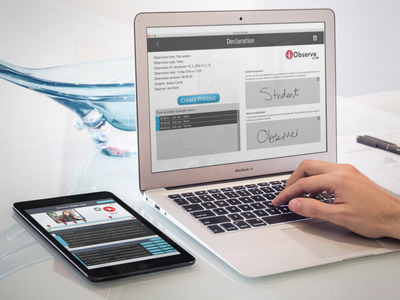
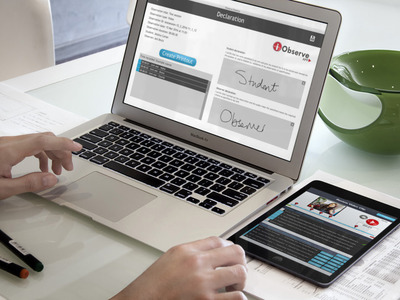
10. At the end of a recording you’ll be automatically taken to the Declaration screen which lists the title, date, and length of the recording as well as the name of the student and the observer and a list of criteria/standards achieved.
11. The observer and the student both sign the declaration, then press create printout to create a signed declaration detailing the criteria met. A declaration form that you can print is saved to your Photo Gallery.
12. Press save at the top of the screen to save the files.
How to review recordings in iObserve
1. On the main menu screen press the Review a saved session button.
2. Press the session you’d like to review.
3. Press the load session button at the bottom of the screen. If you want to delete the session, press the delete session button.
4. The Review Clip screen has a timeline along the top. Red markers show where in the recording the criteria were met.
5. The screen has two sections – Review which lists all of the criteria for the course, and Time Recorded which shows when in the recording each criterion was met.
6. To replay the entire recording, press the red play button. To replay a specific time stamp, go to the Time Recorded section and press the relevant recording.
7. If when reviewing the recording you find that you missed a criterion, simply play the recording, then press the relevant criterion at the relevant time and a new time stamp will appear. If you find that you’ve made an error, you can press the blue delete button to remove a time stamp.
8. Press finish in the top corner to move to the next screen.
How to transfer the audio files from your iPad to your computer
1. Plug your iPad into your computer using the USB lead.
2. Open iTunes on your computer. Press the iPad button.
3. Select Apps from the menu.
4. Scroll down to the bottom of the Apps screen to the section named file sharing.
5. Select the folder you want to transfer from your iPad to your computer. Press the save to button.
6. A dialog box will open. Simply choose the location you want to save the file to.
How to transfer the audio files from your android tablet to your computer
1. Plug your Android device into your computer using the USB lead.
2. Open My Computer on your computer and then double click your device to open it.
3. Open the folder storage/internal storage.
4. Inside this folder will be all your recordings. We recommend you copy files from these folders instead of moving them as this will cause them to be removed from the iObserve app.